
Laundry Room Makeover: How to go from cramped to spacious
In this DIY laundry room makeover, learn how a simple layout change turned a cramped laundry area into a spacious workspace.

This post contains affiliate links. As an Amazon Associate I earn from qualifying purchases. See my full disclosure here.
For years my husband wanted to give our laundry room a makeover and by makeover he meant completely rearrange the layout. He hoped to move our washer & dryer to the pantry area in our laundry room. Unfortunately, the huge, plywood water heater closet was in the way. We did not have a another place where we could put it. Our only hall closet houses our HVAC. Thankfully, we found a solution that allowed us to create a spacious and functional laundry area for our family.
Laundry Room Before
In the picture below you can see the original pantry and plywood water heater “closet” that blocks at least a third of the pantry opening.

The water heater closet location pushed the washer and dryer into the opening space of our back door. Because of this, the door always slammed into the dryer. (pictured below) As you can imagine, this was the most frustrating part of the original layout. To be honest, this one caveat caused quite a bit of stress around our house daily…for years.

First we had to confirm that the interior wall to wall area of the pantry would fit a washer & dryer. Our next step was to find a solution for the water heater & closet dilemma. Ultimately we decided to install an outdoor tankless water heater. Going the tankless route meant we would be able to completely remove the plywood closet & existing water heater resulting in a large amount of reclaimed square footage!
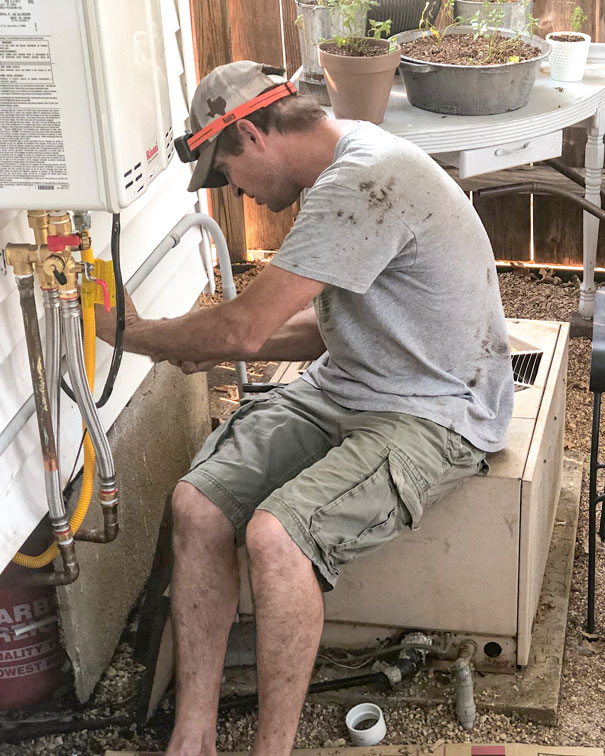
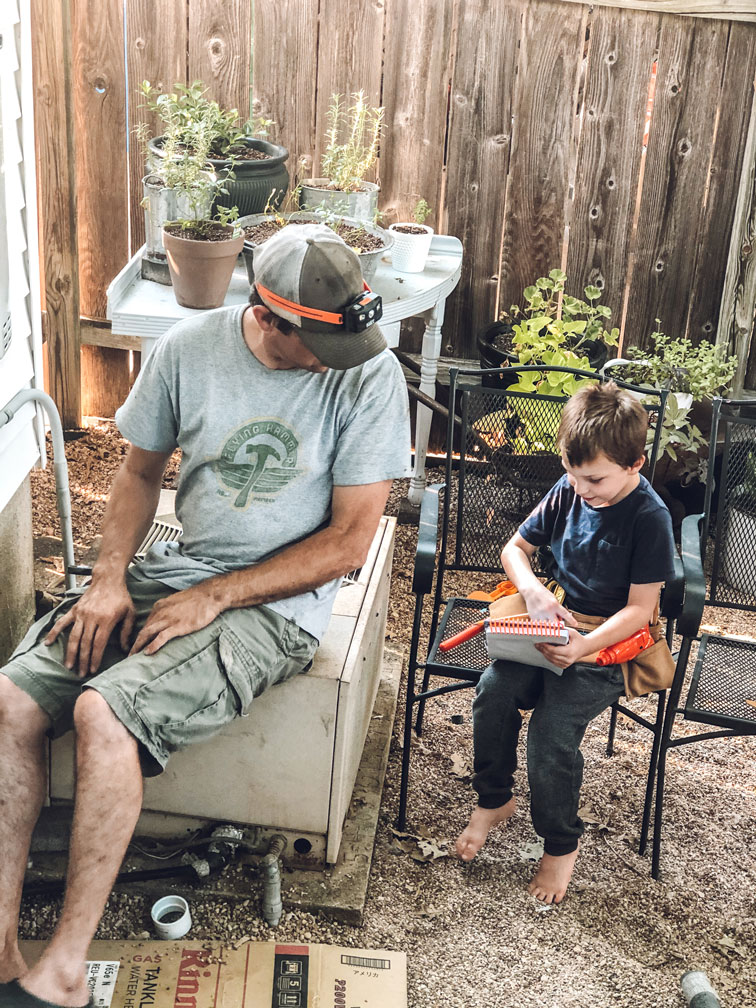
So after saving up for a couple of months, we ordered a Rinnai V65EN tankless water heater. My husband installed it himself which saved us quite a bit of money. Below you can see him finishing up the installation. I’m sure the cute little helper by his side made all the difference!!
After the outdoor tankless water heater was installed it was time to remove the old tank and plywood closet, then remove the pantry doorway wall. Also popularly referred to as #demoday!! Let me just say that removing a wall of 90 year old tongue and groove pine isn’t the easiest, but I did it!
During


Once the closet and pantry wall were completely removed, we needed to move the washer & dryer connections to the old pantry. My husband relocated all the necessary plumbing and installed the proper electrical receptacles. (He is a licensed electrician.) We were fortunate that our house sits on a pier and beam (aka crawlspace) foundation which makes plumbing changes easier since there is not a concrete slab to contend with. We did our research and watched a lot of YouTube videos to make this possible.

1. Washing machine outlet box 
2. Pre-measured for the box. 
3. After installation.
Pulling the new layout together involved patching the original tongue and groove walls, some creative trim details, lots of caulk and paint and installation of a new floor. Another change we made in our laundry room makeover was to replace the old steel back door with a solid wood, half light door. This door was a Facebook marketplace steal at only $40! Not only was it the perfect size, but the window panes allowed more natural light to filter in.

DIY Laundry Room Counter
A laundry room counter over a front loading washer & dryer pair was a must-have on my makeover wish list. The counter was by far the easiest project in this whole room. I DIYed it with an extra thick, pine project panel and some pine 2×3’s from Lowe’s. I attached a 2×3 with longs screws to each side wall and one on the back wall to make a ledger for the counter to rest on. To disguise the ledgers a bit, I painted them in Valspar Swiss Coffee, the same color I used on the walls and ceiling. After I cut the project panel to the right dimensions (this took several tries b/c #oldhouse), I sanded it smooth, stained it & sealed it prior to installing it. Here is a brief video about it.
The upper shelves are two 2×12’s installed using the same ledger method as the counter but with ledgers only attached to each side wall.

Laundry Room After
I was amazed at how a simple layout change could result in such a bright, spacious laundry room. The wood counter makes folding clothes and linens a breeze. I used my favorite white baskets on the shelves to organize extra things like mason jars, light bulbs, egg cartons, etc. The stackable acrylic drawers keep our cleaning rags neat and tidy. I also made a hanger rail out of copper pipe and pipe hangers. Our kitchen is connected through the doorway to the left. It was important to us to be able to close off the room so we didn’t hear the washer or dryer running as we ate. In order to save floor space, we hung an old door on a sliding barn door track. As an added bonus, the track works great to hang clothing as it comes out of the dryer!
A beverage dispenser jar holds liquid detergent. (Quick tip, change out those cheap plastic spigots with a metal one like this!). Various glass vessels hold baking soda, vinegar and oxygen whitening powder. A couple fabric hanging baskets hold wool dryer balls and cleaning rags. A vintage spice rack that belonged to my grandmother was the perfect spot for our essential oil collection. That cute frog piggy bank on the counter eats all the loose change I find while doing laundry. Quick DIY chalkboard labels, made with scrap wood, chalkboard paint and gold brads, help keep everything in its place…well when my family actually reads them. LOL. A simple wire bulb cage added to the original pull chain light fixture adds a modern farmhouse vibe.

I installed two rows of wood peg rail using 1″x 4″ pine boards and 3.5″ wooden pegs. (painting them sure was tedious!) I hoped that the peg rail would take the storage in this room up a notch. I must say, I am in love!! It is my favorite feature. So much so, that I have already started looking for ways to add it in to our kitchen renovation. The pegs are a convenient place to hang a towel or swimsuit to dry, hang storage baskets or let a wet dish rag dry. These canvas hanging hampers work perfectly on the peg rail to help keep the floor clear of laundry piles.

The area pictured below is where the washer and dryer used to sit. In the original layout, the washer sat directly under the window. Every time I walk into this room I am in awe of how open it feels. Now, I can actually swap laundry without interfering with someone using the back door.

We found the waterproof, vinyl plank flooring on clearance at Home Depot, probably 4 or 5 years back. It is easy to clean and hides dirt well. Hooks and peg rail galore expand the storage potential in here without taking up valuable floor space. Plus it looks cute too! Since we live in a house that is just over 1,000 square feet, I have to be creative when it comes to storage.

Overall, we are so pleased with our laundry room makeover. The updated layout made this area feel open and spacious instead of cramped and chaotic. Every minute and dollar spent on this space was worth the result of a functional workspace for our family of five. Next time you feel like a space in your home is cramped, look around and ask yourself “Would a layout change help this room function better?”.

Room Sources
Below I have linked as many sources as possible. If there is something you don’t see be sure to leave a comment below and I will do my best to find it.
This post contains affiliate links. As an Amazon Associate I earn from qualifying purchases. See my full disclosure here.


